- Usually Ships Following Business Day
LiftMaster
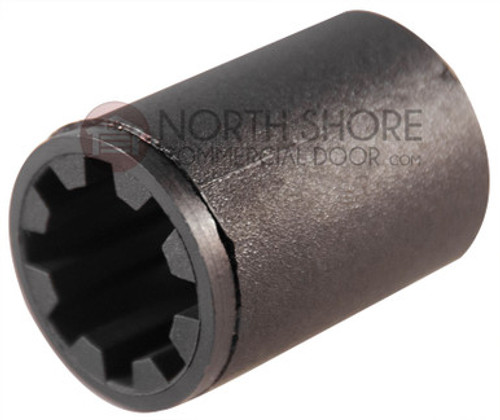
Liftmaster K025C0020 Screw Drive Sprocket Coupler
- Usually Ships Following Business Day
The LiftMaster K025C0020 Screw Drive Sprocket Coupler is a critical replacement part for post-1995 Chamberlain, LiftMaster, and Sears Craftsman screw drive garage door openers. This coupler transfers rotational power from the motor to the screw drive mechanism, enabling smooth opening and closing operation. When this part fails, it can leave your opener non-functional—making it essential for quick and cost-effective repairs.
This direct-fit replacement is easy to install with basic tools and saves you the cost of a full opener replacement. The durable construction ensures long-term reliability for residential garage door systems.
Product Highlights:
-
Part Number: K025C0020
-
Alternate Part Numbers: 25A20, 025C0020, 25A18
-
Compatibility:
-
LiftMaster: 1000SD, 2000SD, 1000SDR, 2000SDR, 2110, 2220
-
Chamberlain: 4600, 4620, 4640, 9902, PD420, PD460-2, 9950
-
-
Fits post-1995 models
-
Type: Screw-drive coupler for garage door openers
Installation Overview: Step-by-Step
Tools You’ll Need:
-
Adjustable wrench
-
Socket wrench with appropriate socket (3/8" for models 3130/3240 or 7/16" for 1000SDR/2000SDR)
-
Flat-head screwdriver
-
Phillips-head screwdriver
-
Access to the opener’s overhead rail
Step 1: Disconnect Power
Before performing any work, disconnect the power to your garage door opener at the outlet or breaker. This is critical for safety.
Step 2: Detach the Rail from the Power Unit
Use the appropriate socket and wrench to remove the nuts and hex screws connecting the rail to the power head (motor unit). Carefully slide the rail back from the power unit.
Step 3: Remove the Old Coupler
Slide the old, worn coupler off the sprocket shaft at the end of the rail. You may need a flat-head screwdriver to pry it loose if it's stuck due to wear or debris.
Step 4: Install the New Coupler
Take the new K025C0020 coupler and align the teeth with the grooves in the sprocket and shaft. Slide it into place firmly, ensuring a snug fit for proper power transfer.
Step 5: Reconnect the Rail and Power Unit
Slide the rail forward until it meets the power unit bracket. Reinstall the original nuts and screws to secure the rail firmly to the opener head.
Step 6: Test the Opener
Restore power to the opener. Use a remote or wall control to open and close the garage door, verifying smooth, quiet operation. Listen for any abnormal noises or skipping, which may indicate misalignment.
Note: If you're unsure about compatibility or need installation support, consult your opener's manual or reach out to Action Direct’s support team for guidance.


