Programming Genie Garage Door Operators
Posted by Action Direct on 20th Oct 2023
The Genie Company is a leading innovator in the garage door operator industry, and if you’ve recently purchased a model for residential or commercial applications, it’s paramount that you know how to install the operator correctly for the safety of everyone involved. Action Direct has been supplying Genie operators and educating customers on their ins and outs for decades, so read below for a step-by-step guide to installing and configuring down/up travel limits, setting the force control, and programming additional remotes for an operator.
Is Genie a Good Brand?
Genie is one of the most trusted garage door manufacturers in today’s market. They take pride in being an industry leader in innovative technology—from creating the first mass-produced, radio-controlled residential garage door opener in the 1950s to the smart home technology the company continues to improve upon today. If you haven’t yet purchased a Genie operator or are curious about how your current Genie model ranks with other models, you can check out our handy Genie Garage Door Openers Comparison Guide Chart!
Before Installation
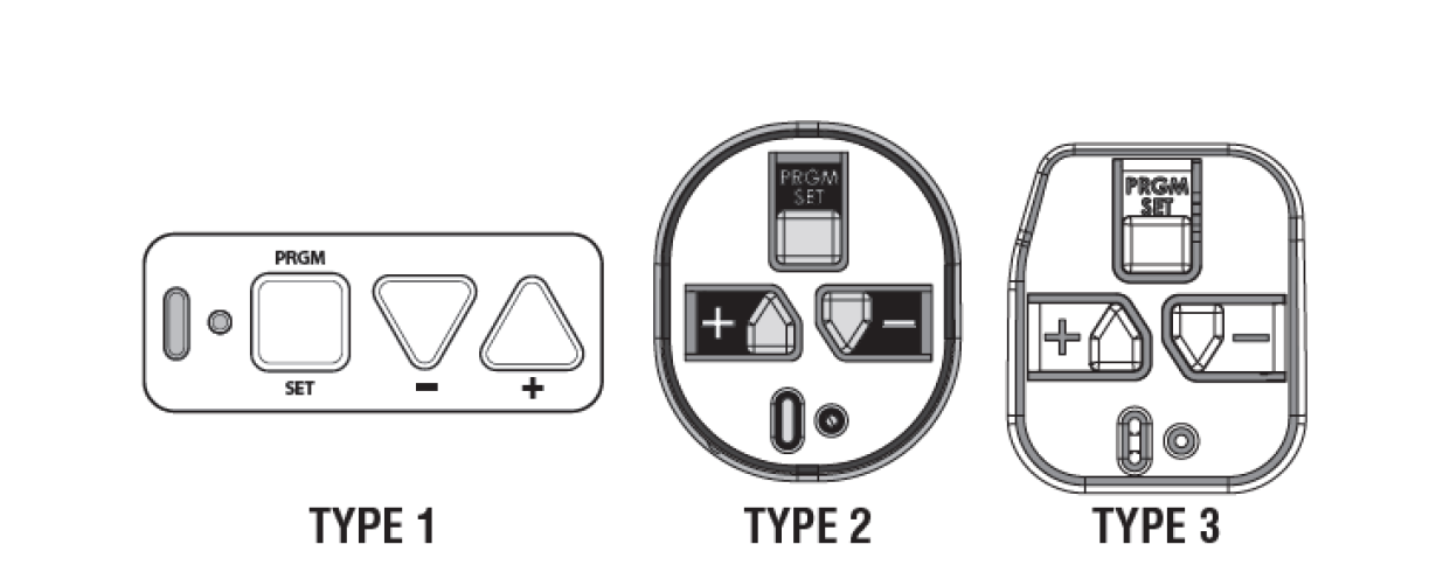
There are three types of programming pads on Genie’s current models. All buttons perform the same function and programming. Familiarize yourself with the configuration of the operator you’re installing.
1. How to Configure Down Limits and Up Travel Limits
A. Configuring Travel Limits — Down Limit
-
Connect the trolley to the rail.
-
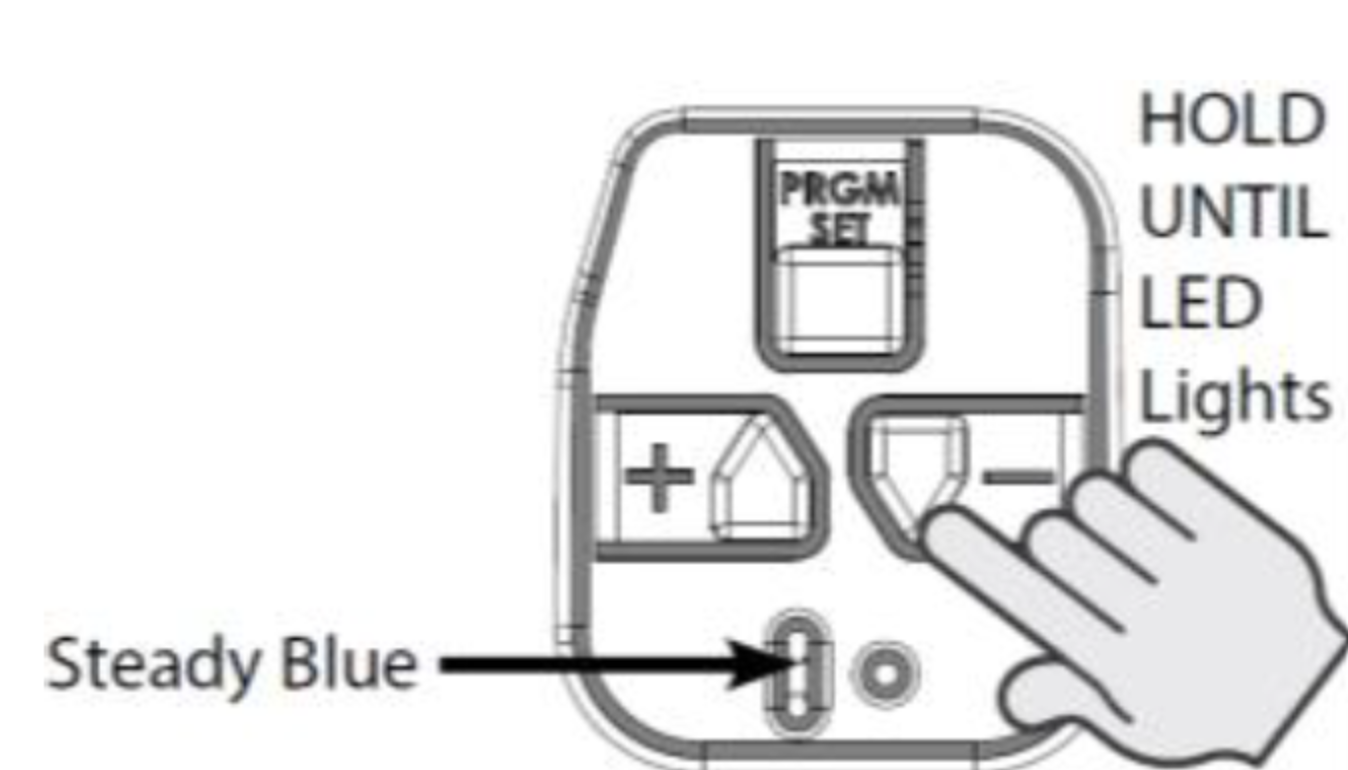
Press and hold the down arrow button “-” for two seconds or until the long blue LED turns on.
-
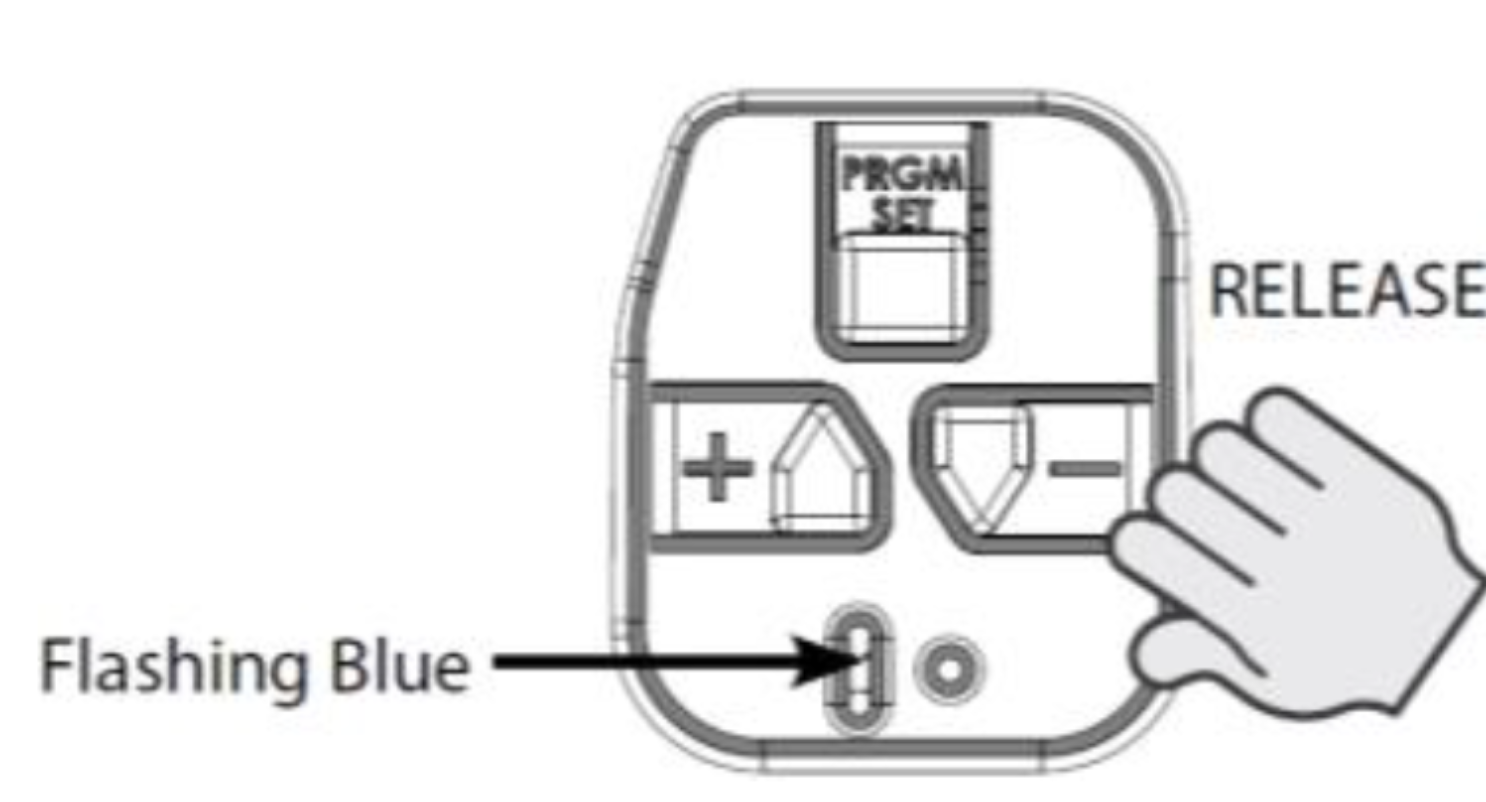
Release the down arrow button “-” and the long blue LED will begin to flash. The round LED will remain off.
-
Press and hold the down arrow “-” until the garage door fully closes.
-
If the door is too tight to the ground, use the up arrow “+” to raise the door slightly.
-
Press and release the PRGM SET button once. Both LEDs will turn blue and turn off.
-
The closed travel limit is now programmed.
B. Configuring Travel Limits — Up Limit
-
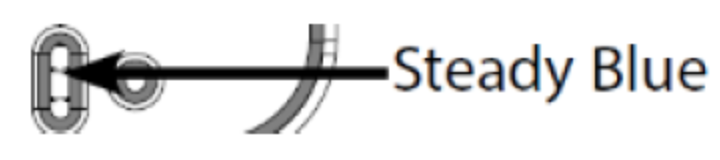
Press and hold the up arrow “+” for two seconds until the long LED changes to blue.
-
Release the up arrow “+” and the round blue LED will begin flashing. The long LED turns off.

-
Press and hold the up arrow “+” until the door is fully open. Press the down arrow “-” if the door opens too far.
-
Press and release the PRGM SET button once. Both LEDs will turn blue and turn off.
-
The open travel limit is now programmed.
2. How to Program Genie Force Control
After programming travel limits, you can set the opener’s force control by running a full open and close cycle (uninterrupted) using the wall console or programmed remote.
-
Press the open/close button to close the door.
-
Press the open/close button again to open the door.
-
The automatic force control is now configured.
3. How to Program Genie Remote Controls
Note: Genie remotes included with your operator are preprogrammed from the factory.
To add additional remotes:
-
Press and hold the PRGM SET button for two seconds until the round LED turns blue, then release.
-
The long LED will flash purple.

-
Slowly press and release the remote control button two times. The LEDs on the operator will flash purple, then blue, and then turn off.
-
Press the button a third time to move the garage door. The remote is now programmed.
Go Further with Genie!
Once your Genie operator is installed, explore Genie’s line of garage accessories designed to take your setup to the next level with smart home tech like Intellicode and HomeLink. If you're overwhelmed by the variety or unsure which remote or keypad fits your needs, Action Direct has you covered on our blog!
Still Curious About Genie Garage Door Operator Installation?
Please ask! Our in-house experts can help you with all your Genie-related questions. Get in touch with our support crew: